25 November 2010

How to set the default location for Revit® 2011 help documentation

Let me share this tip to you to wrap-up this last full week of November. Remember, it's Thanksgiving Day today.

It is often annoying if you are using a PC without an Internet connection and you would like to consult the Help documentation. The following is a solution from Autodesk.

Add the following 3 lines to the bottom of the Revit.ini file:

[Documentation]
UseHelpServer=1
HelpBrowser=0

To specify online help documentation use UseHelpServer=1
To specify local help documentation use UseHelpServer=0


To read more about it, follow the link:
http://usa.autodesk.com/adsk/servlet/ps/dl/item?siteID=123112&id=14994272&linkID=9243099

12 November 2010

More about curved ramps

Here’s a little tip about curved ramps.
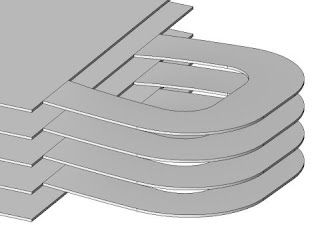
I’ve been discussing with my co-worker that one can create a curved ramp even though the width varies and even with an irregular form. The trick here is to do the basic modeling of the curved ramp using a constant width say for example 5000 mm. Important to know is that the Run you sketch along the path of the ramp is the average centerline of the model. After you adjust all the properties of the ramp and you are satisfied with the initial modeling, you can go ahead with using Modify: Ramps>Edit Sketch. You can now edit the form of the ramp (outside bounds), presto … a new curved ramp with an irregular shape.


Feel free to contact me if you have any problems about creating a curved ramp. Of course, any suggestion is always welcome. Happy curved ramp modeling.

9 November 2010

Curved Ramps in Revit

How to create a curved ramp in Revit
This question was asked today during my hectic hours in our office by a co-worker. It seems this might be difficult as one may think. After regrouping my memory during my way back home, a light goes on in my mind. Forget about my colleague suggestion, keep an open mind as you do in the past and do not use the sub element point tool in floors as he was planning to do so.
For this case, you do not have to think of creating a mass nor using the sub element point to reflect the level it was to go up. Very simple, you just create the curved ramps with Revit Ramp tool itself. It is there, just look at the Revit Help if you do not know how to use it. Take a good look at the options, because to create curved ramps are there. The easiest way to add a ramp is to sketch a run. However, the Run tool limits the design of your ramp to straight runs, straight runs with landings, and spiral ramps. You need some guide lines to do the job.

Tip: The default settings for the Top Level and Top Offset properties may make the ramp too long. Try setting the Top Level to the current level, and the Top Offset to a lower value.

4 November 2010

Rotate a single plan view in Revit

Rotate a single plan view in Revit

Presentation of a rotated plan on a sheet can sometimes be a headache for a novice user who does not know how to handle this situation. In Revit you can either choose your project orientation as “True North” or “Project North”. In the example below, we want to present the South West Wing of the plan horizontally on a sheet. This can be a dangerous procedure if you do not know what you are doing because rotating a view will have an impact on the entire orientation of the structure which I suppose you do not intend to do so.

To accomplish this rotated single plan view, do the following:

1. Duplicate the view with detailing.
2. Go to the view just duplicated.
3. Open the Element Properties and change the Orientation to “Project North”.
4. Turn all the Crop Regions.
5. Choose MODIFY and select the crop region.
6. Use the ROTATE command to turn the crop region, which will turn the view in the opposite direction.
7. Place the rotated plan view on your sheet.